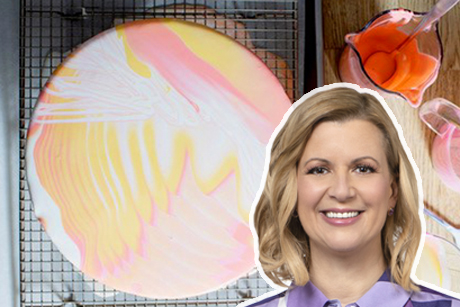
I love a mirror glaze cake and to be honest, while I find that entremet style of cake, mousse and fruit filling delightful to eat, it’s the making, assembling and glazing of the dessert that I love the most. Here are some tips so that you can dive right into this fun, reflective world of mirror glazing.
What to Glaze

Photo courtesy of Janis Nicolay
Pick a dessert that has a smooth outside finish and a pleasing shape. Most mirror-glazed desserts are mousse based and are assembled in individual or full-size molds and then frozen to set them. Silicone molds come in countless shapes and they are flexible and peel away from the mousse easily. You can also assemble a mousse cake in a regular metal springform pan. You can use a heat gun on a low setting to gently warm the metal a little so that it lifts away from the cake easily.
Related: Anna Olson’s Chocolate Recipes for Every Skill Level
Mixing Your Mirror Glaze Colours

Photo courtesy of Janis Nicolay
A mirror glaze is composed of white chocolate, condensed milk, sugar, water and gelatine. When mixing, blend your glaze on low speed to avoid air bubbles and strain the glaze before tinting it. Because white chocolate has a natural yellow hue to it, you will want to neutralize that by adding white food colouring to the glaze. Then you can divide the glaze into separate pitchers to be tinted as you wish. Once made, the glaze can take 20 minutes or so to cool to the ideal pouring temperature, between 80-86°F (27-30°C), so be patient.
See More: Chocolate Animals DIY
How to Pour a Mirror Glaze
You have a few choices here. You can pour each colour onto your cake separately, making sure to cover the cake completely. Drawing an offset palette knife over the top of the cake will blend the colours a little and can give you that “galaxy” look. Or, if you’re feeling daring, you can go for the “tie-dye” effect and layer the colours before you pour. Select your base colour and slowly pour in all of the other colours, one at a time, into the base, pouring carefully in a thin stream. These colours will remain distinct in the pitcher (do not stir!) so that when you pour the glaze over the cake, the colours will create ripples and ribbons of colours that look like they are moving, even once set.
Remember that no two mirror glaze cakes look exactly the same, so just go for it. Before you pour, elevate the cake on a dish or stand that is smaller than the width of the cake, so that the excess glaze can run off easily and place a baking tray and rack underneath to catch that glaze. The extra glaze can be reheated and reused again, but the colours will blend.

Photo courtesy of Janis Nicolay
You can pour onto the centre of the cake and let gravity do its bit, or if the cake is on a wheel, you can spin the cake as you pour in the centre, creating a spiral effect. You can also pour back-&-forth. Regardless of the pouring technique, try to pour evenly and steadily and without disruption. Take a moment to look at all sides of the cake to make sure it is completely covered.
See More: Anna Olson’s Best Chocolate Recipes
The glaze sets quickly, so after you see that the glaze pattern stops moving and dripping, use a palette knife to scrape away excess glaze from the base of the cake (or if you miss that window of time, use scissors or a paring knife to trim it away). Resist the temptation to touch or move the glaze after the first minute or so – every mark will show. But now you can add extra garnish – splatters of edible sparkle dust or top with piping detail, fruit or other chocolate decor. Remove the cake to a plate and chill until ready to serve.
Be prepared for “ooh’s” and “aaah’s” as you amaze your family or friends and impress yourself.
Watch Great Chocolate Showdown Mondays at 9 p.m. ET/PT. Watch and stream all your favourite Food Network Canada shows through STACKTV with Amazon Prime Video Channels, or with the new Global TV app, live and on-demand when you sign-in with your cable subscription.
