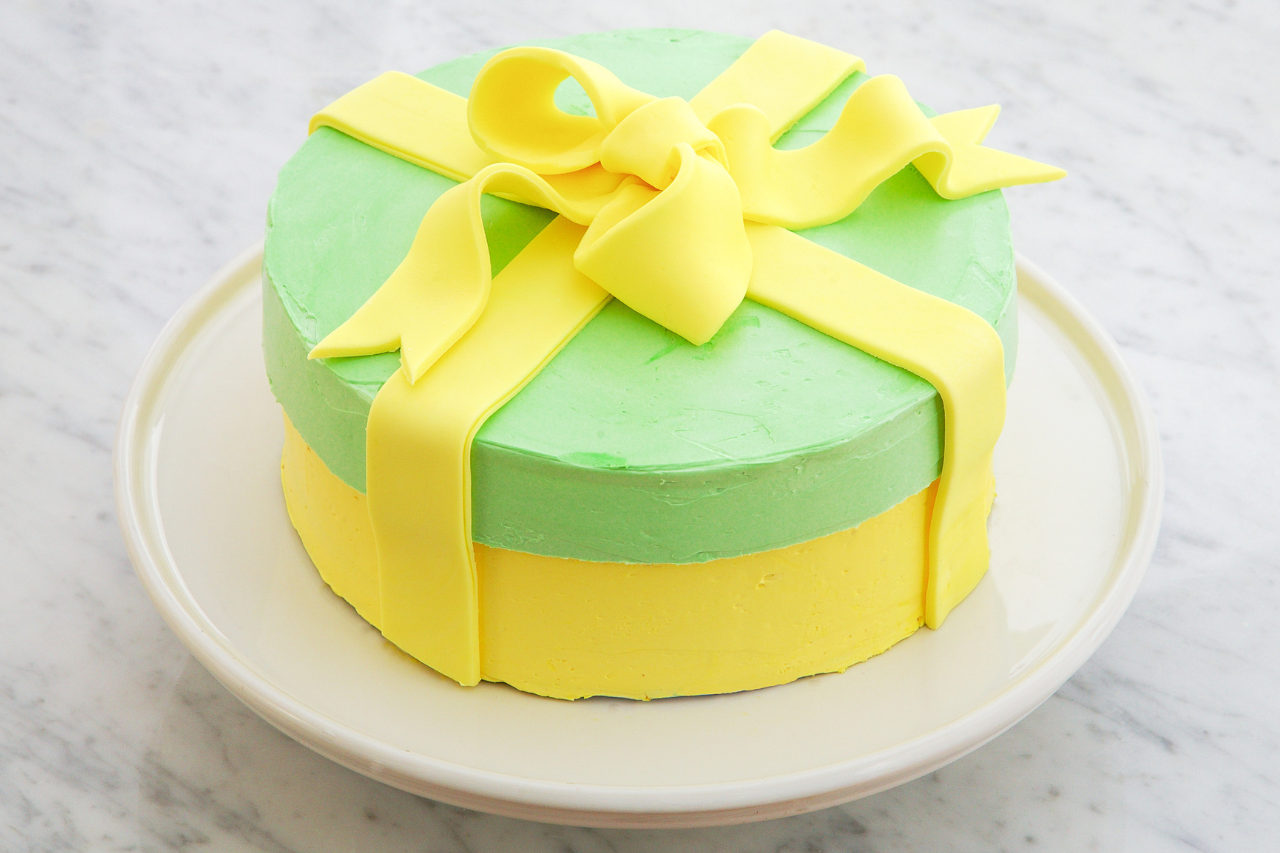
This lemon layer cake is finished with a light but rich Swiss buttercream frosting, and is decorated in a style that makes it look like a hatbox with a lid & ribbon.
Makes one 8-inch (20 cm) layer cake
ingredients
Cake
Swiss Buttercream
Hatbox Assembly
directions
The cake can be made and assembled a day before serving it, and it will keep refrigerated, after cutting, for 2 days.
Preheat the oven to 350 ºF (180 ºC). Grease three 8-inch (20 cm) cake pans and line the bottom of each pan with parchment paper, and sprinkle the sides of the pans with sugar, tapping out any excess.
Sift the flour, sugar, baking powder and salt into a large mixing bowl or into the bowl of a stand mixer fitted with the paddle attachment. Stir in the lemon zest. Add the butter and work in on medium-low speed until large bits of butter are no longer visible.
Whisk together the buttermilk, egg whites and vanilla and add this all at once to the flour mixture. Mix this first on low speed until blended and then increase the speed to medium high and beat until smooth and light, about 3 minutes. Divide the batter evenly between the 3 pans and spread to level. Bake the cake for 30 to 35 minutes, until a tester inserted in the centre of the cake comes out clean. Cool the cakes for 20 minutes in the pan, then turn out to cool completely.
For the buttercream, whisk the egg whites and sugar together in a metal bowl. Place the bowl over a saucepan filled with an inch of gently simmering water and whisk constantly until a temperature of 160 ºF (71 ºC) is reached on a thermometer. Using electric beaters, or transferring the whites to the bowl of a stand mixer fitted with the paddle attachment, whip the whites on high speed until they are thick and glossy and have cooled to room temperature, about 8 minutes. Reduce the speed to medium and add the butter in pieces, a little at a time. Increase the speed to high again and whip until fluffy and smooth. If the buttercream does not look smooth, just keep whipping and it will smooth out. Beat in the lemon zest and vanilla. Use the buttercream while at room temperature.
Spoon ¼ of the buttercream into a small bowl and tint this light green (this will be the frosting to make the hatbox lid). Tint the remaining ¾ of the frosting to a desired yellow tint.
Place a single cake layer (having peeled away the parchment paper) on a cake wheel or other cake platter and top with an even layer of buttercream. Place the second cake layer and cover it with buttercream. Top with the final cake layer and cover the top and sides of the cake with an even, smooth layer of buttercream. Chill this for just 20 minutes.
Cut a piece of parchment paper that is about 1 ½ inches (4 cm) shorter than the height of the cake, but the same circumference. Wrap this parchment paper around the side of the cake, flush with the base. Now spread the reserved green buttercream over the top and the top portion of the side of the cake, so that it just covers over the top edge of the parchment paper (creating the lid to the hatbox). Carefully peel off the parchment, leaving a clean line giving the hatbox lid and defined edge. Chill the cake while preparing the fondant (or the cake can be prepared hours ahead and chilled).
Add a little colouring (green or yellow) to the fondant and knead it to work it in. On a work surface light dusted with icing sugar, roll the fondant into a long rectangular piece just under ¼ -inch (6 mm) thick. Cut two strips, each about an inch wide and long enough to extend fully over the cake. Place these two strips over the cake, crossing over each other at the centre, on top of the cake. Pinch the fondant at this cross, to make it look as if they are pieces of ribbon tied together. Cut and shape two loops to make the loops of the bow and wrap a piece of fondant around the centre, binding the loops together. Cut two shorter strips of fondant to make the ends of the ribbon and place these to meet on top of the cake. Place the bow on top and press gently to secure. Chill the cake until ready to serve.
